
前回のブログで、M5Stamp-C3をとりあえず動かしてみましたが、今回はAitendoさんの1.8インチTFT液晶モジュールを試してみました。
使用したTFT液晶モジュールは、1.8インチ(128×160)TFTでSPI接続のタイプです。
〇TFT:1.8インチ、128×160ドット
〇信号インターフェース:シリアル4-wire SPI
〇動作電源:DC 3V
〇内蔵コントローラチップ:ST7735R
詳細は、AitendoさんのHPへどうぞ https://www.aitendo.com/product/3858
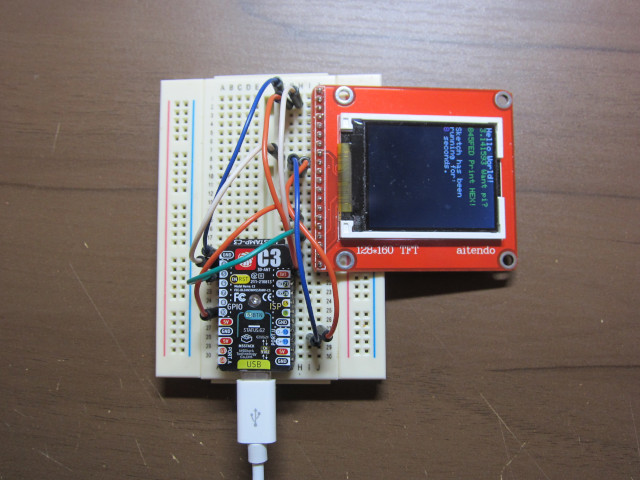
前回同様、ブレッドボードに乗せて試してみました。
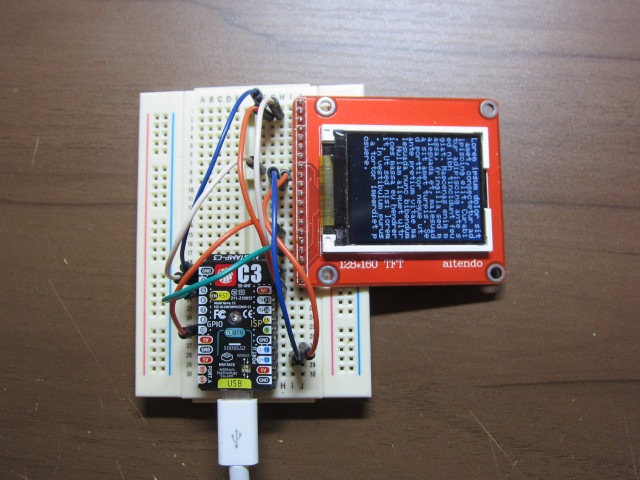
配線は、以下のとおりです。
| TFT液晶モジュール | M5Stamp-C3 | |
| GND(1) | ⇔ | GND |
| VCC(2) | ⇔ | 3.3V |
| A0(8) | ⇔ | 4 |
| SDA(9) | ⇔ | 19 |
| SCK(10) | ⇔ | 18 |
| CS(15) | ⇔ | 10 |
| REST(17) | ⇔ | 5 |
| LED-A(19) | ⇔ | 3.3V |
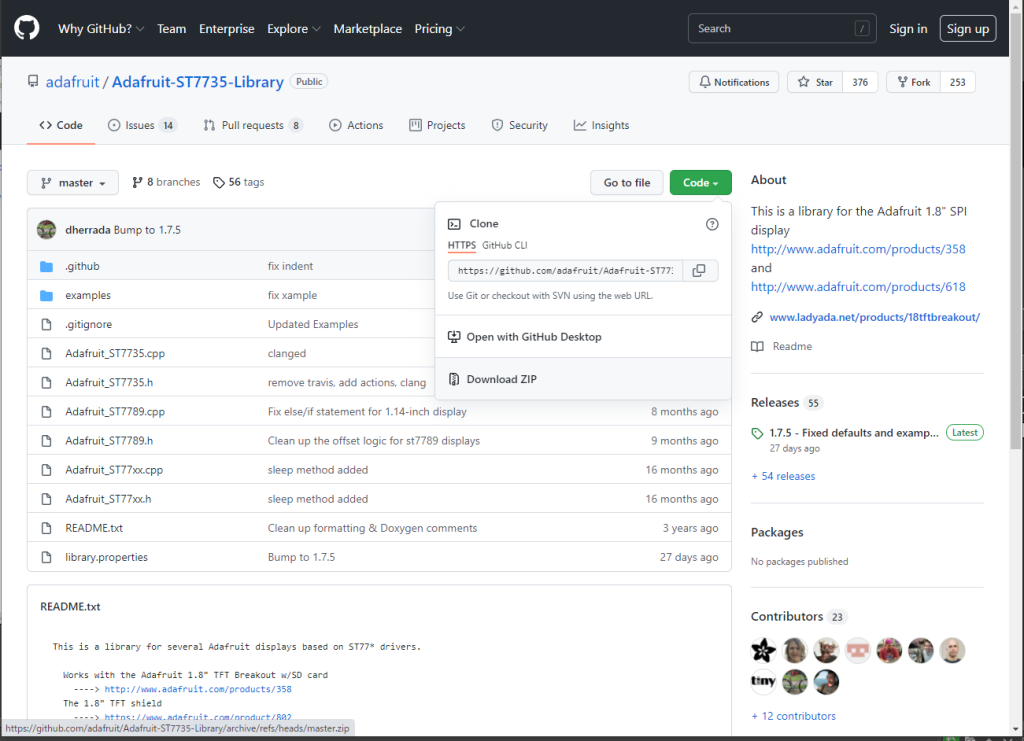
液晶のコントローラーにはST7735Rが使われていますので、Adafruit-ST7735-Libraryを使います。リンク先のページで、「Code」から「Download ZIP」を選びます。
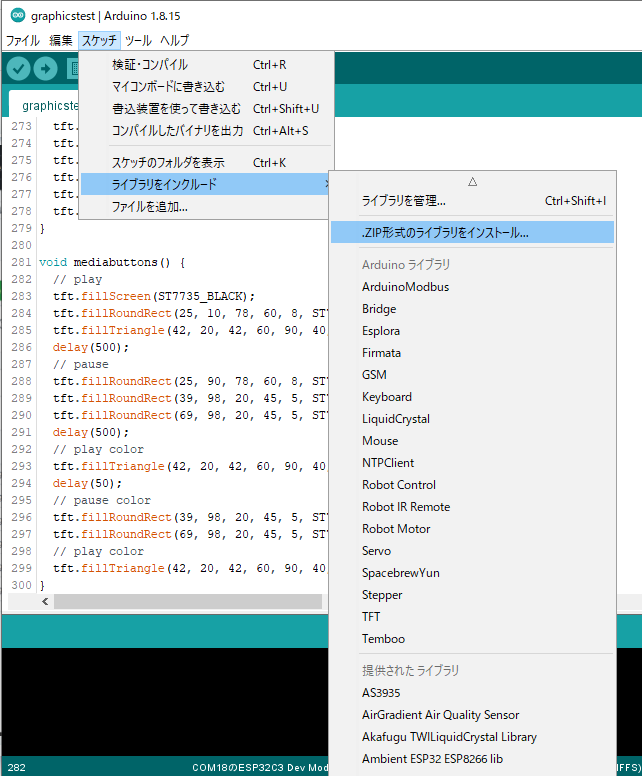
ArduinoIDEで「スケッチ」-「ライブラリをインクルード」-「.ZIP形式のライブラリをインクルード」でダウンロードしたZIPファイルを選択してください。
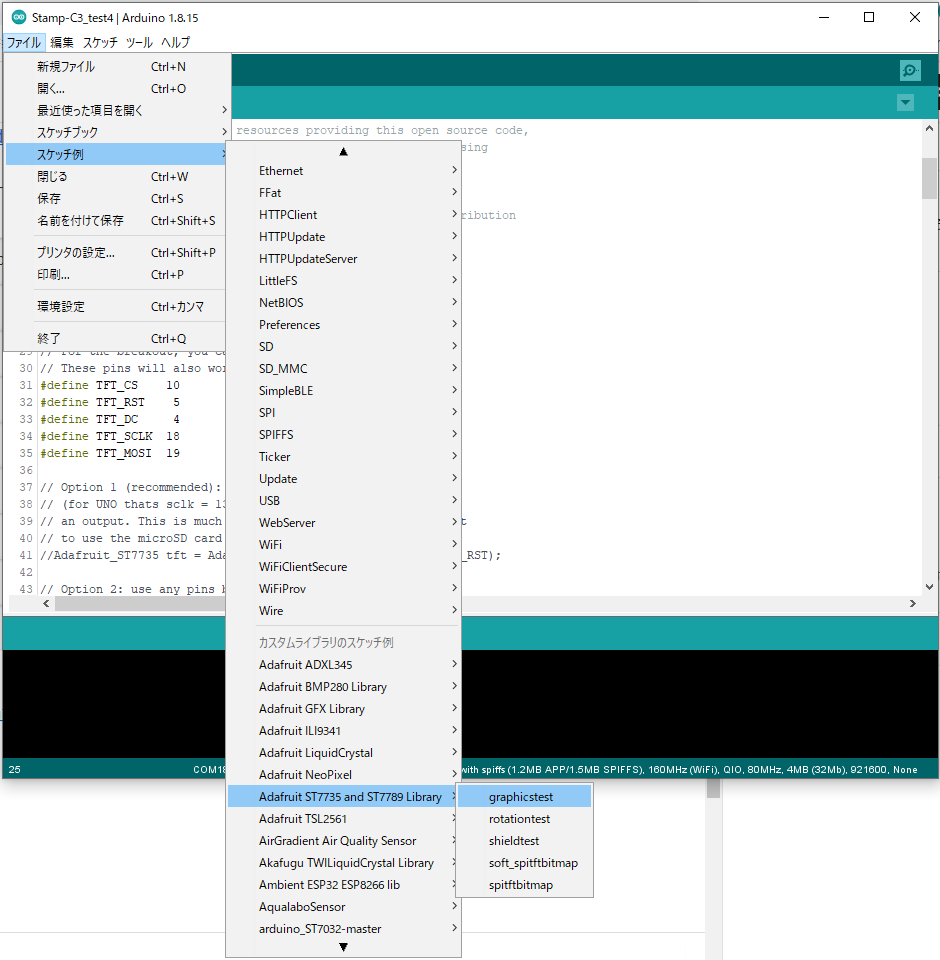
ライブラリをインクルードすると、「ファイル」-「スケッチの例」に「 Adafruit ST7735 and ST7789 Library」が出てくると思いますので、「 graphicstest」を呼び出して みましょう。
プログラムソースは、以下のとおりです。変更するのは、31,32,34,43,44行目のピン番号、43行目のtftの定義をコメントアウトし、45行目のtftの定義を有効にします。
/***************************************************
  This is a library for the Adafruit 1.8" SPI display.

This library works with the Adafruit 1.8" TFT Breakout w/SD card
  ----> http://www.adafruit.com/products/358
The 1.8" TFT shield
  ----> https://www.adafruit.com/product/802
The 1.44" TFT breakout
  ----> https://www.adafruit.com/product/2088
as well as Adafruit raw 1.8" TFT display
  ----> http://www.adafruit.com/products/618

  Check out the links above for our tutorials and wiring diagrams
  These displays use SPI to communicate, 4 or 5 pins are required to
  interface (RST is optional)
  Adafruit invests time and resources providing this open source code,
  please support Adafruit and open-source hardware by purchasing
  products from Adafruit!

  Written by Limor Fried/Ladyada for Adafruit Industries.
  MIT license, all text above must be included in any redistribution
 ****************************************************/

#include <Adafruit_GFX.h>    // Core graphics library
#include <Adafruit_ST7735.h> // Hardware-specific library
#include <SPI.h>


// For the breakout, you can use any 2 or 3 pins
// These pins will also work for the 1.8" TFT shield
#define TFT_CS     10
#define TFT_RST    5  // you can also connect this to the Arduino reset
                      // in which case, set this #define pin to 0!
#define TFT_DC     4

// Option 1 (recommended): must use the hardware SPI pins
// (for UNO thats sclk = 13 and sid = 11) and pin 10 must be
// an output. This is much faster - also required if you want
// to use the microSD card (see the image drawing example)
//Adafruit_ST7735 tft = Adafruit_ST7735(TFT_CS,  TFT_DC, TFT_RST);

// Option 2: use any pins but a little slower!
#define TFT_SCLK 18   // set these to be whatever pins you like!
#define TFT_MOSI 19   // set these to be whatever pins you like!
Adafruit_ST7735 tft = Adafruit_ST7735(TFT_CS, TFT_DC, TFT_MOSI, TFT_SCLK, TFT_RST);


----------- 以下省略 -----------
M5Stamp-C3の小型、高機能とTFT液晶を組み合わせれば、利用価値はグンとアップすると思います。是非、試してみてください。

コメント